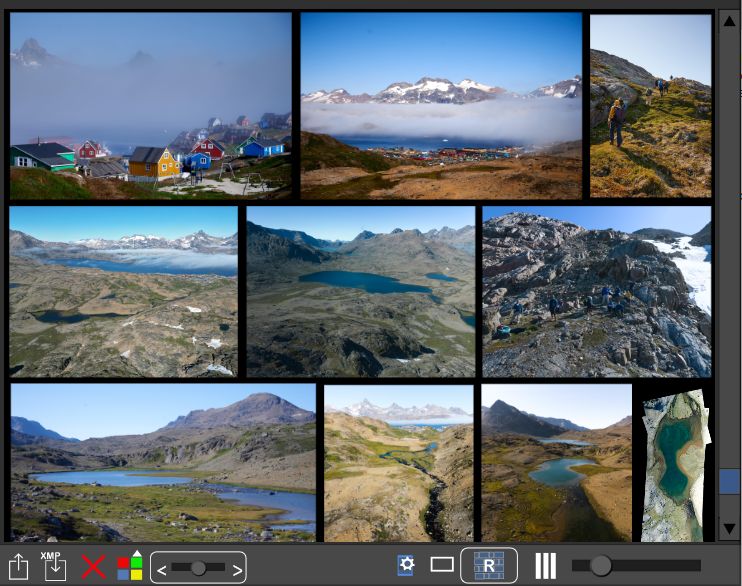
Main view of the image database software
Main view - overview
The middle part of the program window, the array or single view, offers the view into the image database, the image window. Organized around it are the upper and lower toolbars, and the left and right panels. Both panels can be switched on and off, either by pressing the respective buttons in the upper toolbar, or by pressing the keys Ctrl+L and Ctrl+R .
The whole window can be switched to full screen view by pressing Ctrl+F . Pressing the ESC key switches back to the normal view.
The display in the image window can be switched between grid and single view by pressing the space bar. By means of the cursor keys it is possible to navigate between the images, or to select if the shift key was pressed at the same time.
In the left panel there are the tree views for the directories, the tree view for the albums and the tree view for the keywords. You can also navigate in these views by pressing the cursor keys. At the same time you can navigate in the image view by pressing Page Up. Both albums and directories can optionally be turned off, and the timeline activated instead. The size of the respective windows can be changed by moving the title bars.
In the right panel there are buttons for some important commands, as well as the property display for image meta data, for example exposure time, shooting date or the camera used.
In the upper toolbar on the left side there are the buttons for the browse-history, the button for the slideshow F1 the filter and the trash view. Next to it is the field where the selected filters can be displayed. To the right of this are, among other things, the buttons for the Drag&Drop data selection.

There you can also change the sorting order. It can be sorted based on several fields, the last activated field is compared first.
Besides you can switch on/off the hard disk monitoring, reload all the entries in the view (F5) and call the options dialog.
, the search order, the hard disk monitoring and the options dialog.
In the lower toolbar there is a button on the left to switch the display between "Preview" and "Thumbnail" view. "Preview" means the representation of the image as edited, whereas "Thumbnail" means the originally imported version. Next to it is the button for comparison view F3 . To the right there are buttons to decrease or increase the number of stars and to rotate the image. You can start an external program or export images to a directory (F6). Both functions can be used to edit images in specialized programs. The function for the export, opened thereby first a panel, in which the target directory can be adapted easily if necessary.
Furthermore, you will find a slider on the left side that activates the fast forward or rewind. Here, the maximum display speed of the computer can be exhausted. For many people, such a fast change of images is unpleasant, but some appreciate this function very much, in order to review a vacation of several weeks in a few minutes with a bit of concentration.
On the right side of the bottom toolbar you will find the slider for changing the number of columns displayed, the display format as well as the background mode. To the left of these buttons, there is the button for activating the Side View panel. The page view causes the image array to be interrupted in regular sections so that more images start at the top of a virtual page. In the panel for page view this mode can be switched on and off. Also, the aspect ratio of the page, as well as the margins can be changed here. If the page view is enabled, then the virtual pages can be exported to JPEG files as shown. This function can be used to very quickly create a draft for a photo book from a huge number of images. Of course, the quality can be compromised by using only the preview of the images to create the JPEG pages.

In the toolbar at the bottom you can switch how the images are displayed in the array. Either click the right button to toggle through all modes or right-click to open the context menu. The most powerful layout is "Rows". Here the images are arranged in rows to make the best use of the available space. This mode is especially useful for creating a photo book!
By clicking on the left button you can switch between the display modes: With information / Light background / Dark background.
Example of display in "Row" mode: