fotoARRAY Manual
Database export
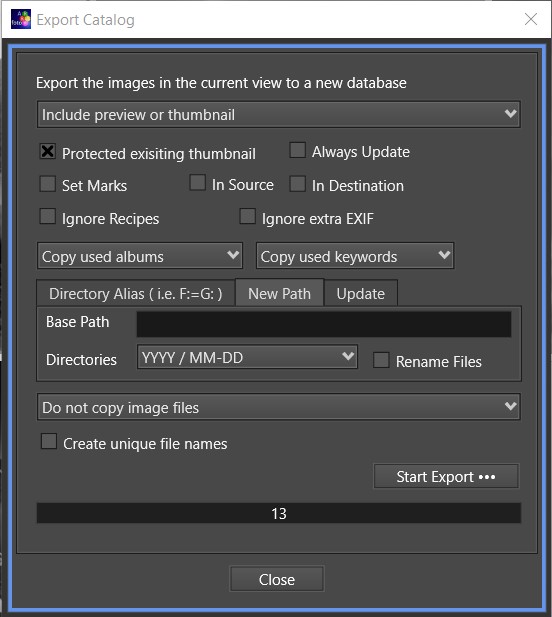
The database export can be started from the menu. A corresponding export window will open. The export function can create a new catalog or modify an existing one. In the latter case, the existing entries are protected against changes, unless you activate the checkbox next to "Always renew".
Images are always identified by their GUID. This property is not the number of the database entry in the catalog, but a unique identification number that is assigned to an image when it is imported into the fotoARRAY database. When exporting, this number is simply reused in the other, new catalog. This makes it possible to match catalogs with each other, since the same images also have the same GUIDs.
For the export, you can specify whether to use the thumbnails or the preview images, or not to create any thumbnails in the generated catalog.
You can also choose to protect existing thumbnails. In this case, if a thumbnails database is found in the target directory, no new thumbnails will be created for the GUIDs contained therein. It does not matter whether the thumbnails in the target are still assigned to database entries or not. So it is possible to delete the database "wpdata.db" in a file manager, but keep the subdirectory "_previews".
During the export it is possible to mark the exported images with a mark in the source and/or the destination, or to delete such a mark. These marks can be easily found using the filter function in fotoARRAY.
You can also choose how keywords or albums are exported:
- do not export
- export all
- export only the entries which are used for at least one image and the respective parent collections. In this case the entries which are currently hidden will not be exported (-> context menu on album/keyword gear button) .
There are three different export modes:
"Directory Alias"
This mode copies the image path names to the new catalog. In addition it is possible to adjust some root directories, for example drive letters, by entering alias in the displayed list.
For example, if the new database should use the disk "G:", whereas the original database uses "F:", then "F:=G:" can be used to activate the automatic renaming.
This mode is also suitable for creating a more compact version of the database file. The image properties are copied, but not additional program parameters. The process can take quite a long time. The progress bar first runs through three times, until in a fourth step all images are copied individually to the target. The number of images already processed is displayed. The various tables are rebuilt in the process and only the necessary entries are copied.
"New Path"
In this mode, all images below a specified base path are sorted into new directories. The names of these directories are always generated from the respective image recording date. Subdirectories with year numbers, month numbers and days can also be created. The result is a clear directory tree in which the images are sorted by date.
The base path is freely selectable and does not necessarily have to contain a root directory. If a root directory, e.g. "F:", is missing, then the directories are relative to the base directory of the fotoARRAY database. So in this case all images are stored below the fotoARRAY catalog. If the entry for the base path remains empty, fotoARRAY will always assume the name "Masters" to create the respective image directories below this directory.
"Update"
in this mode no new database is created, but an already existing database is expected to be selected. No new image files are copied, but only the images that are already found in the target are refreshed. This also only happens if the checkbox "Always refresh" is activated. Otherwise, this mode is only useful to match which images are in the destination. For this purpose, the function that automatically sets the marker in the source database can be used.
FotoARRAY does not copy image files in any case. However, it can, only in the "New Path" mode, create a script file (batch) that contains the required file commands. This script file is created in a second step after the original export has run. By using a script file, the sometimes tedious copying can be done at a later time.