fotoARRAY Manual
Structure of a simple example:
1. we need file theme.xml with the following structure.
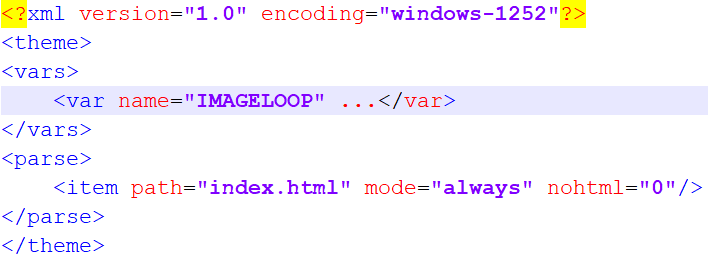
The entries in <parse> tell fotoARRAY which files can contain variables.
Inside < vars> variables are defined. In this simple example we only use on the variable IMAGELOOP, which is used to bring all selected images to the website. For this the XML code must look like this:

We use only a fraction of the possibilities here and simply use <img> HTML tags.
The parameterstype="text" edit="0" visible="0" loop="1" maxcount="9999" are required for the loop variable so that it is recognized as a loop variable on the one hand and is not displayed in the interface on the other.
The code inside < default> is output for each image. Since the output is HTML code, control characters like "<" and ">" must be written in the form "<" and ">". CDDATA blocks are currently not yet possible.
The insertion points for the URL of the images is coded in the form %name%. The predefined variable name IMG thereby embeds a larger image, where IMGMINI creates and links a preview with the side length of 150 pixels.
2. the variables from the theme.xml file are used in index.html.
In this simple example, this code is already sufficient:
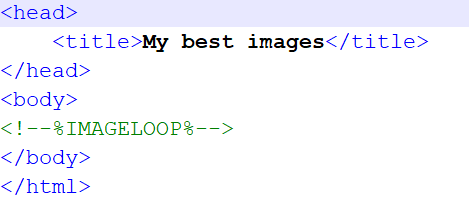
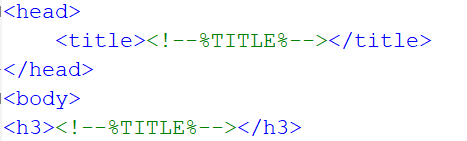
The variable IMAGELOOP is included here within a HTML comment in the form <!--%variablenname%-->. fotoARRAY also optionally allows to include it as a JAVA script comment /*%variablenname%*/ so that the variables can be easily used anywhere.
Whether you use the HTML or the JAVA script style depends on which characters are interpreted as control codes at the specific place. So it is also possible to use the IMAGELOOP to create a JaveScript array, to insert colors in CSS data or just to set the title: <title><!--%TITLE%--></title>. If you edit your template with a HTML WYSIWYG editor (I recommend BootStrap Studio), then you can simply insert the variable in the form /*...*/ in the editor, as these characters will not be changed when exporting the website.
3. testing the export
a) Selection of the folder with the two files index.html and theme.xml

b) Export to an empty folder
c) Result in the web browser
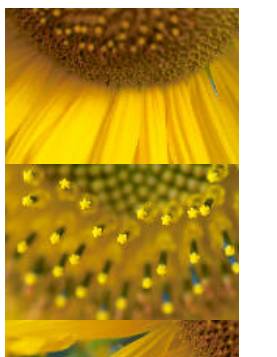 (A click opens a larger version)
4) Simple extensions in theme.xml
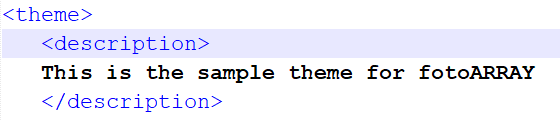
b) Description for the display in fotoARRAY
a) make the title of the website editable in the interface

Of course you have to use this title in the HTML file:
After reloading the template, the description is displayed as well as a changeable variable in fotoARRAY:
